
The following instructions refer to the configuration of Técnico’s e-mail in the Android operating system. This tutorial is based in the Android 12 version and using the Gmail application as the client e-mail application.
1. Open the “Settings” menu in your device. Click in the “Accounts” or similar tab.

2. Click in “Manage accounts”.

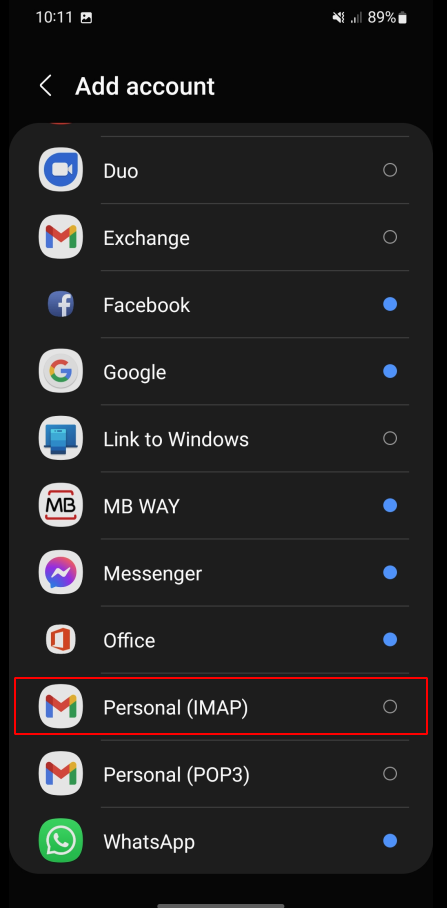
3. Click in “Add account”.

4. Choose the “Pessoal (IMAP)” option or other similar e-mail account option.
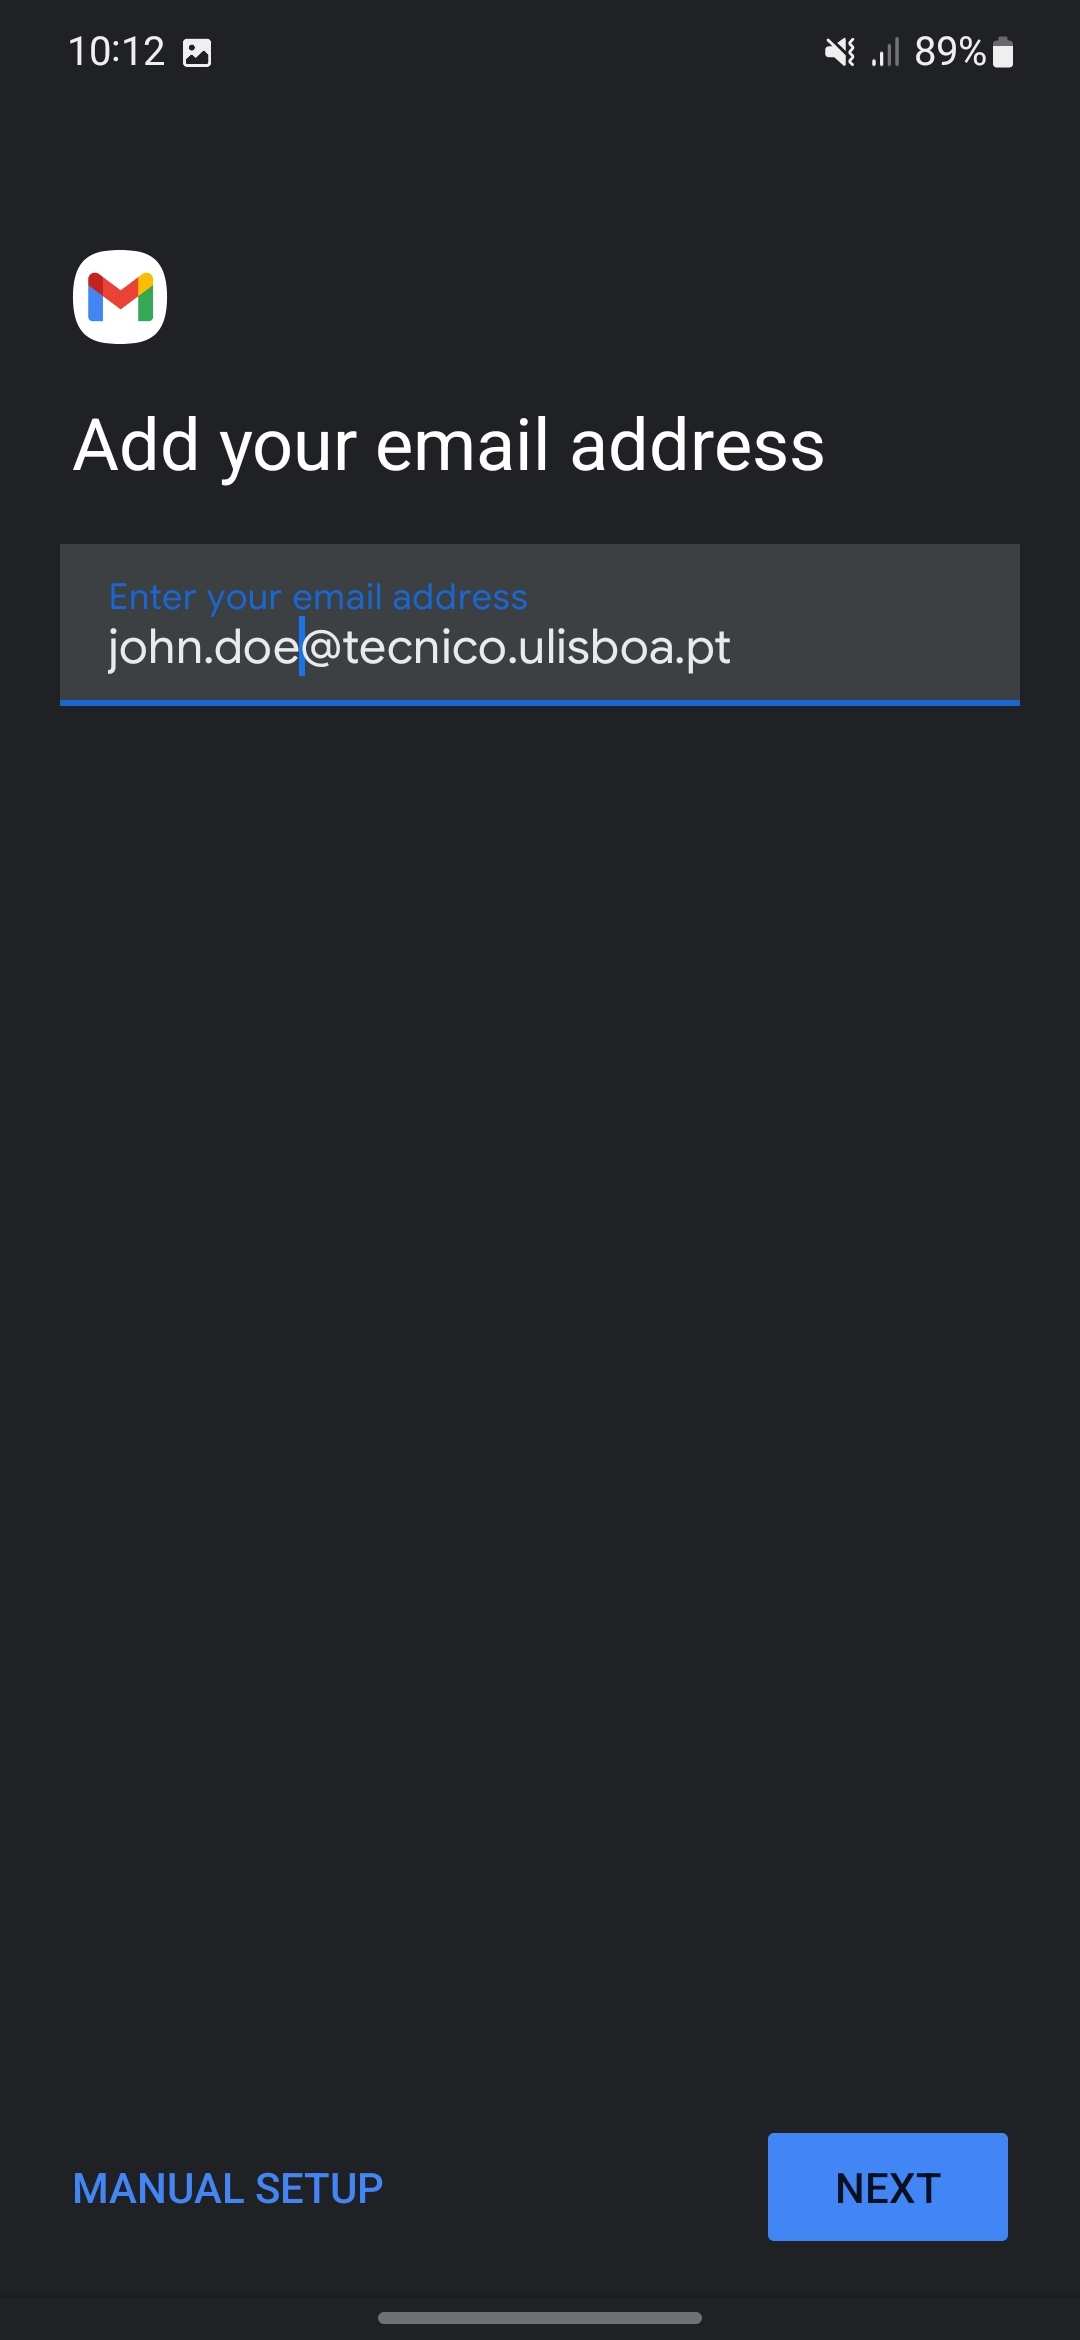
5. Insert your Técnico e-mail address.
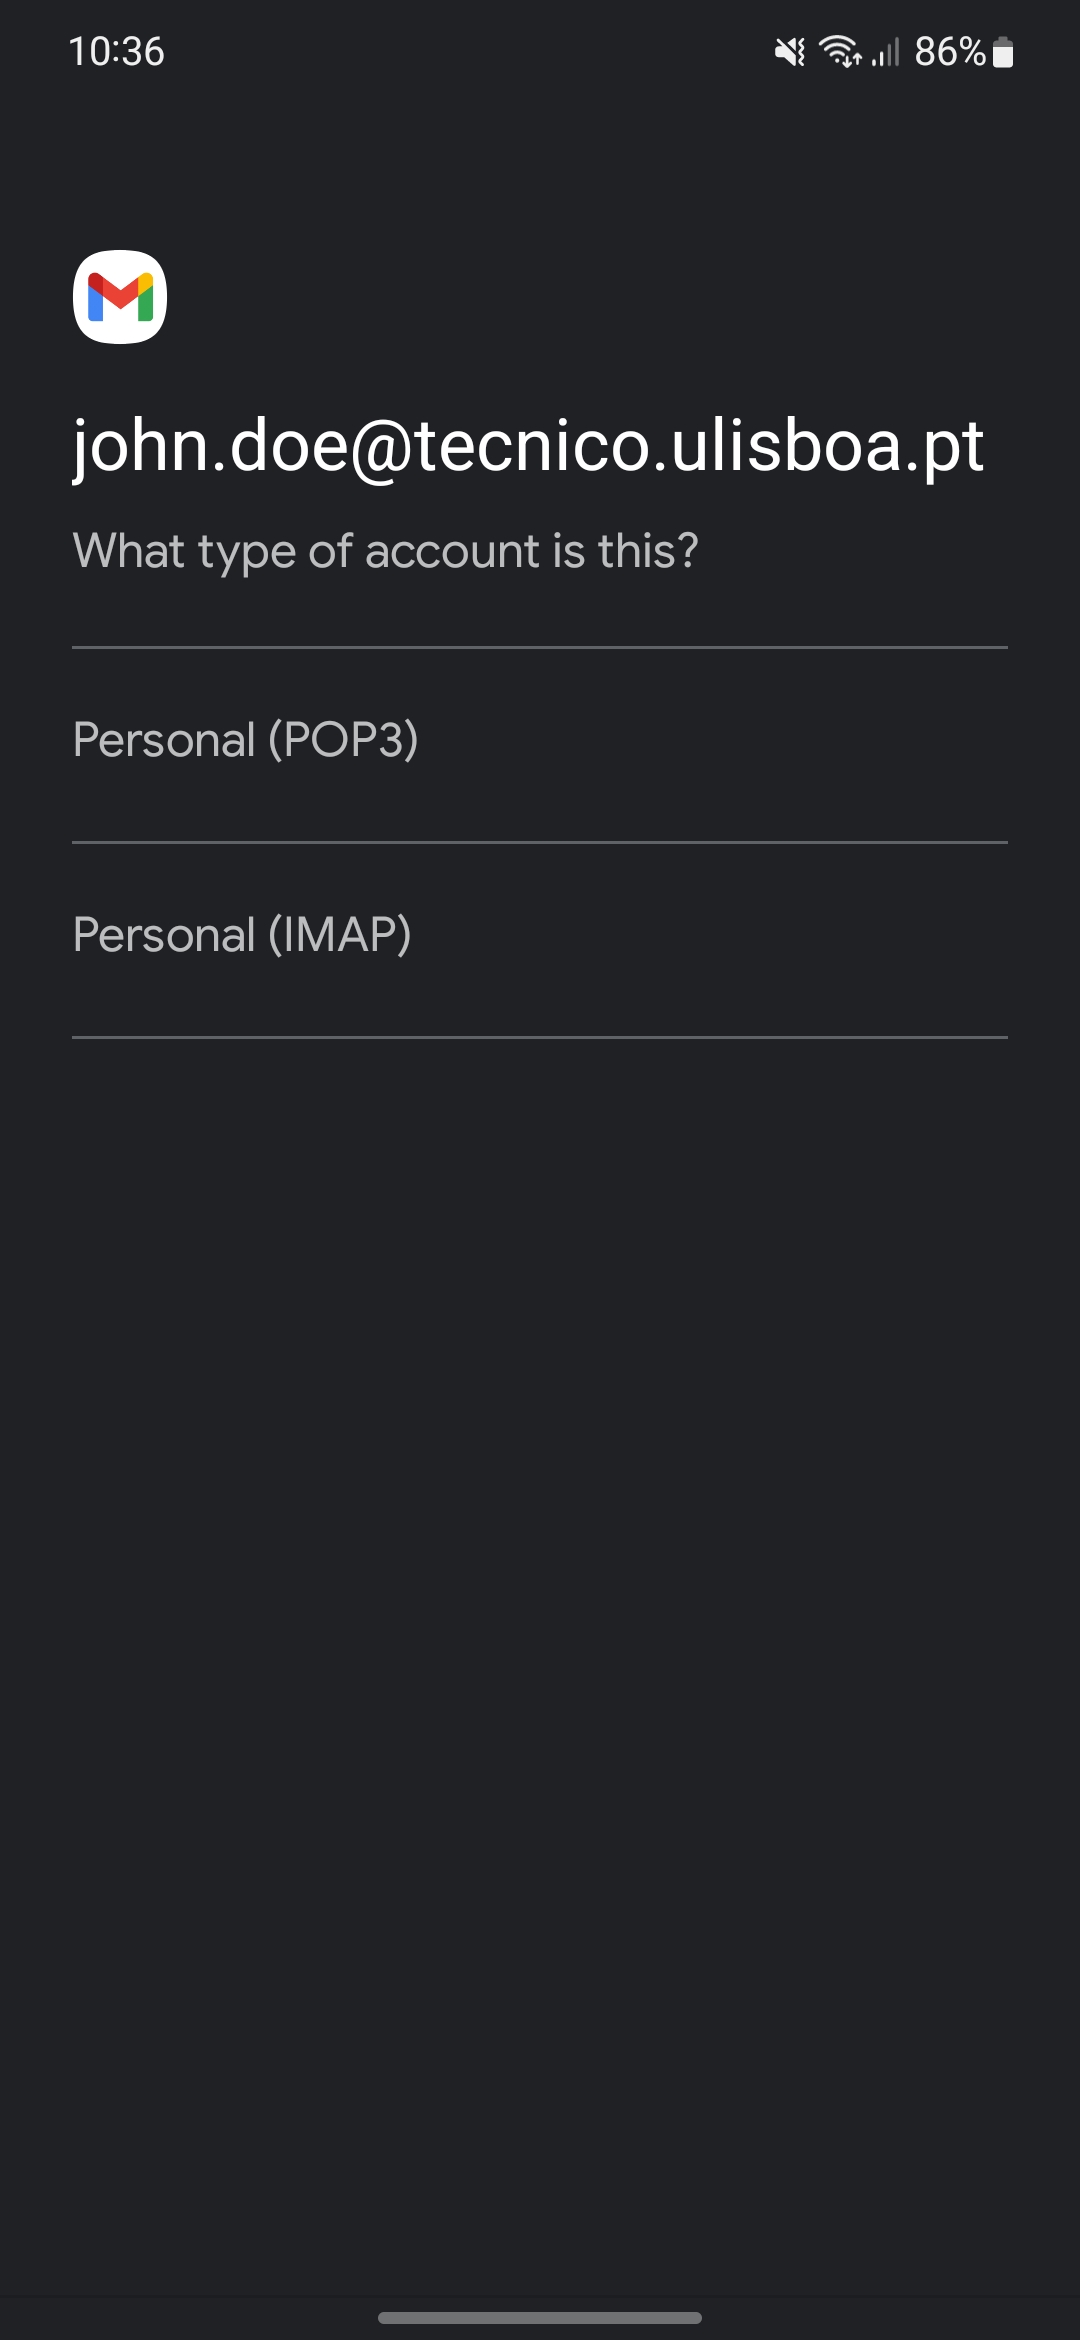
6. Next, in the account option, choose “Personal (IMAP)”.
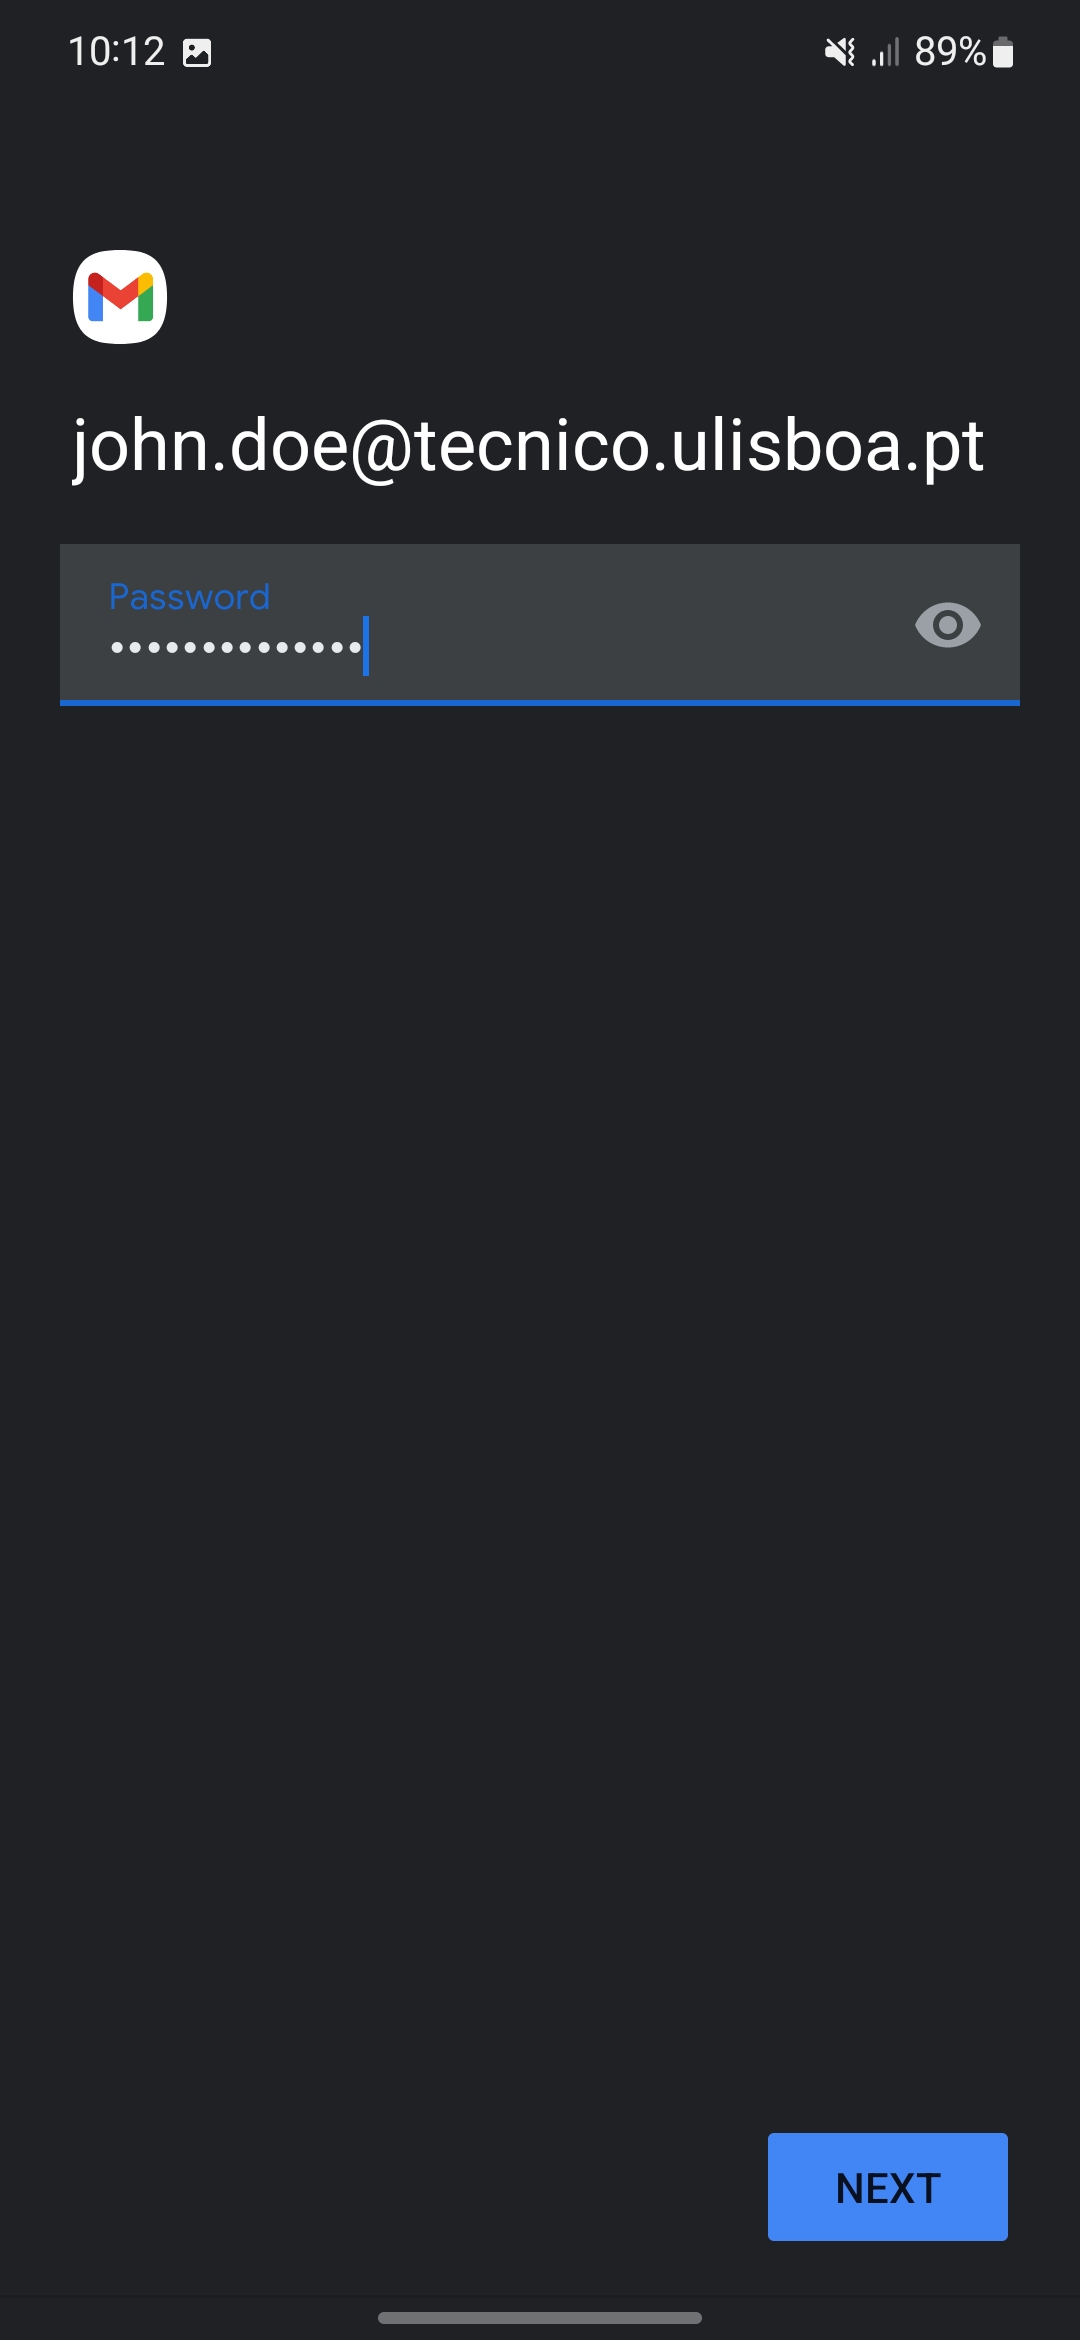
7. Insert the respective password corresponding to your Técnico ID.
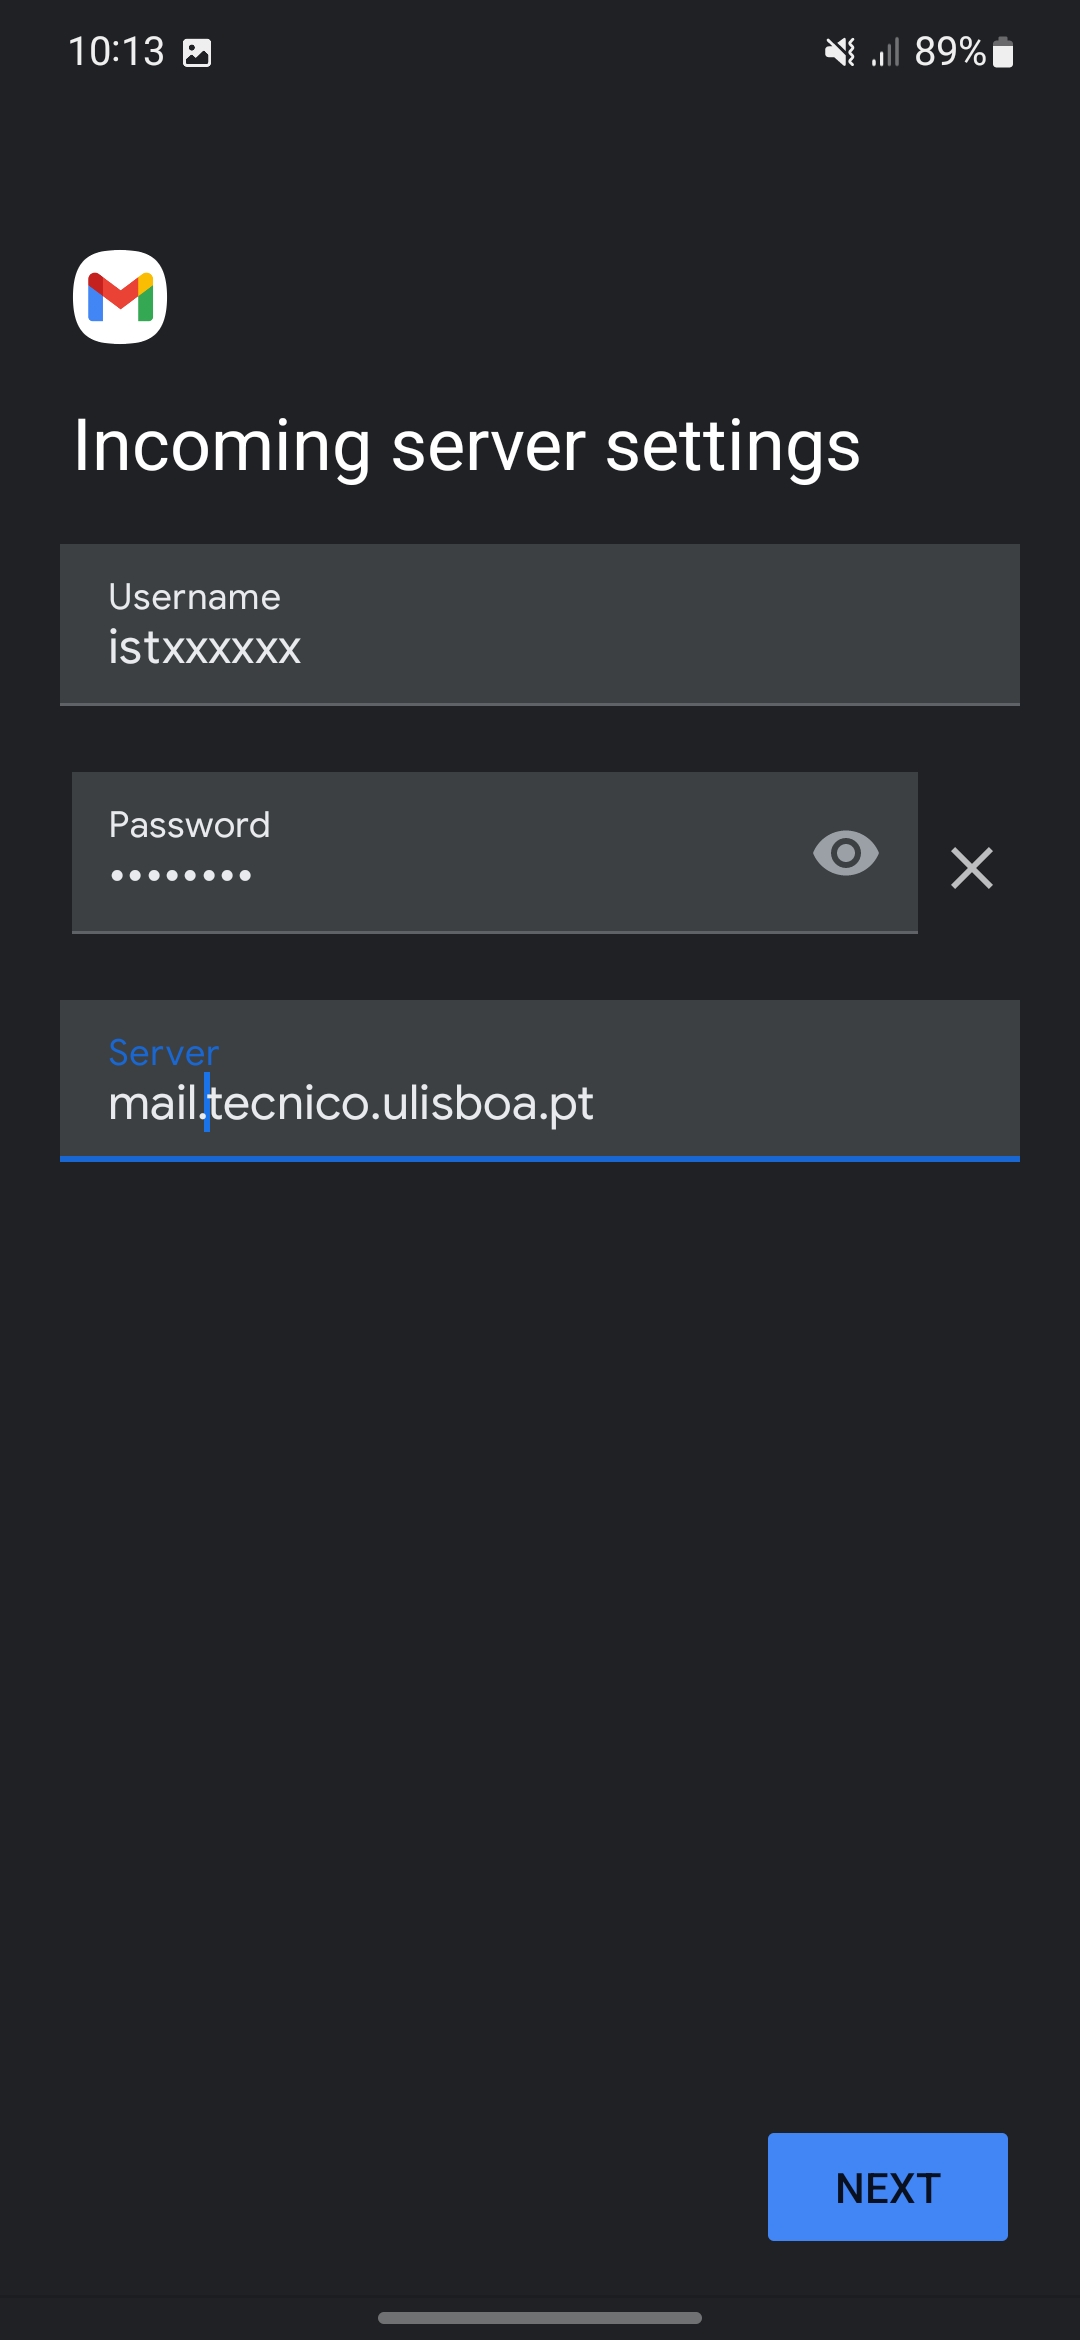
8. In the incoming server settings, fill the following fields:
- Username – istxxxxx, where istxxxxx corresponds to your Técnico ID
- Password – password corresponding to your Técnico ID
- Server – mail.tecnico.ulisboa.pt
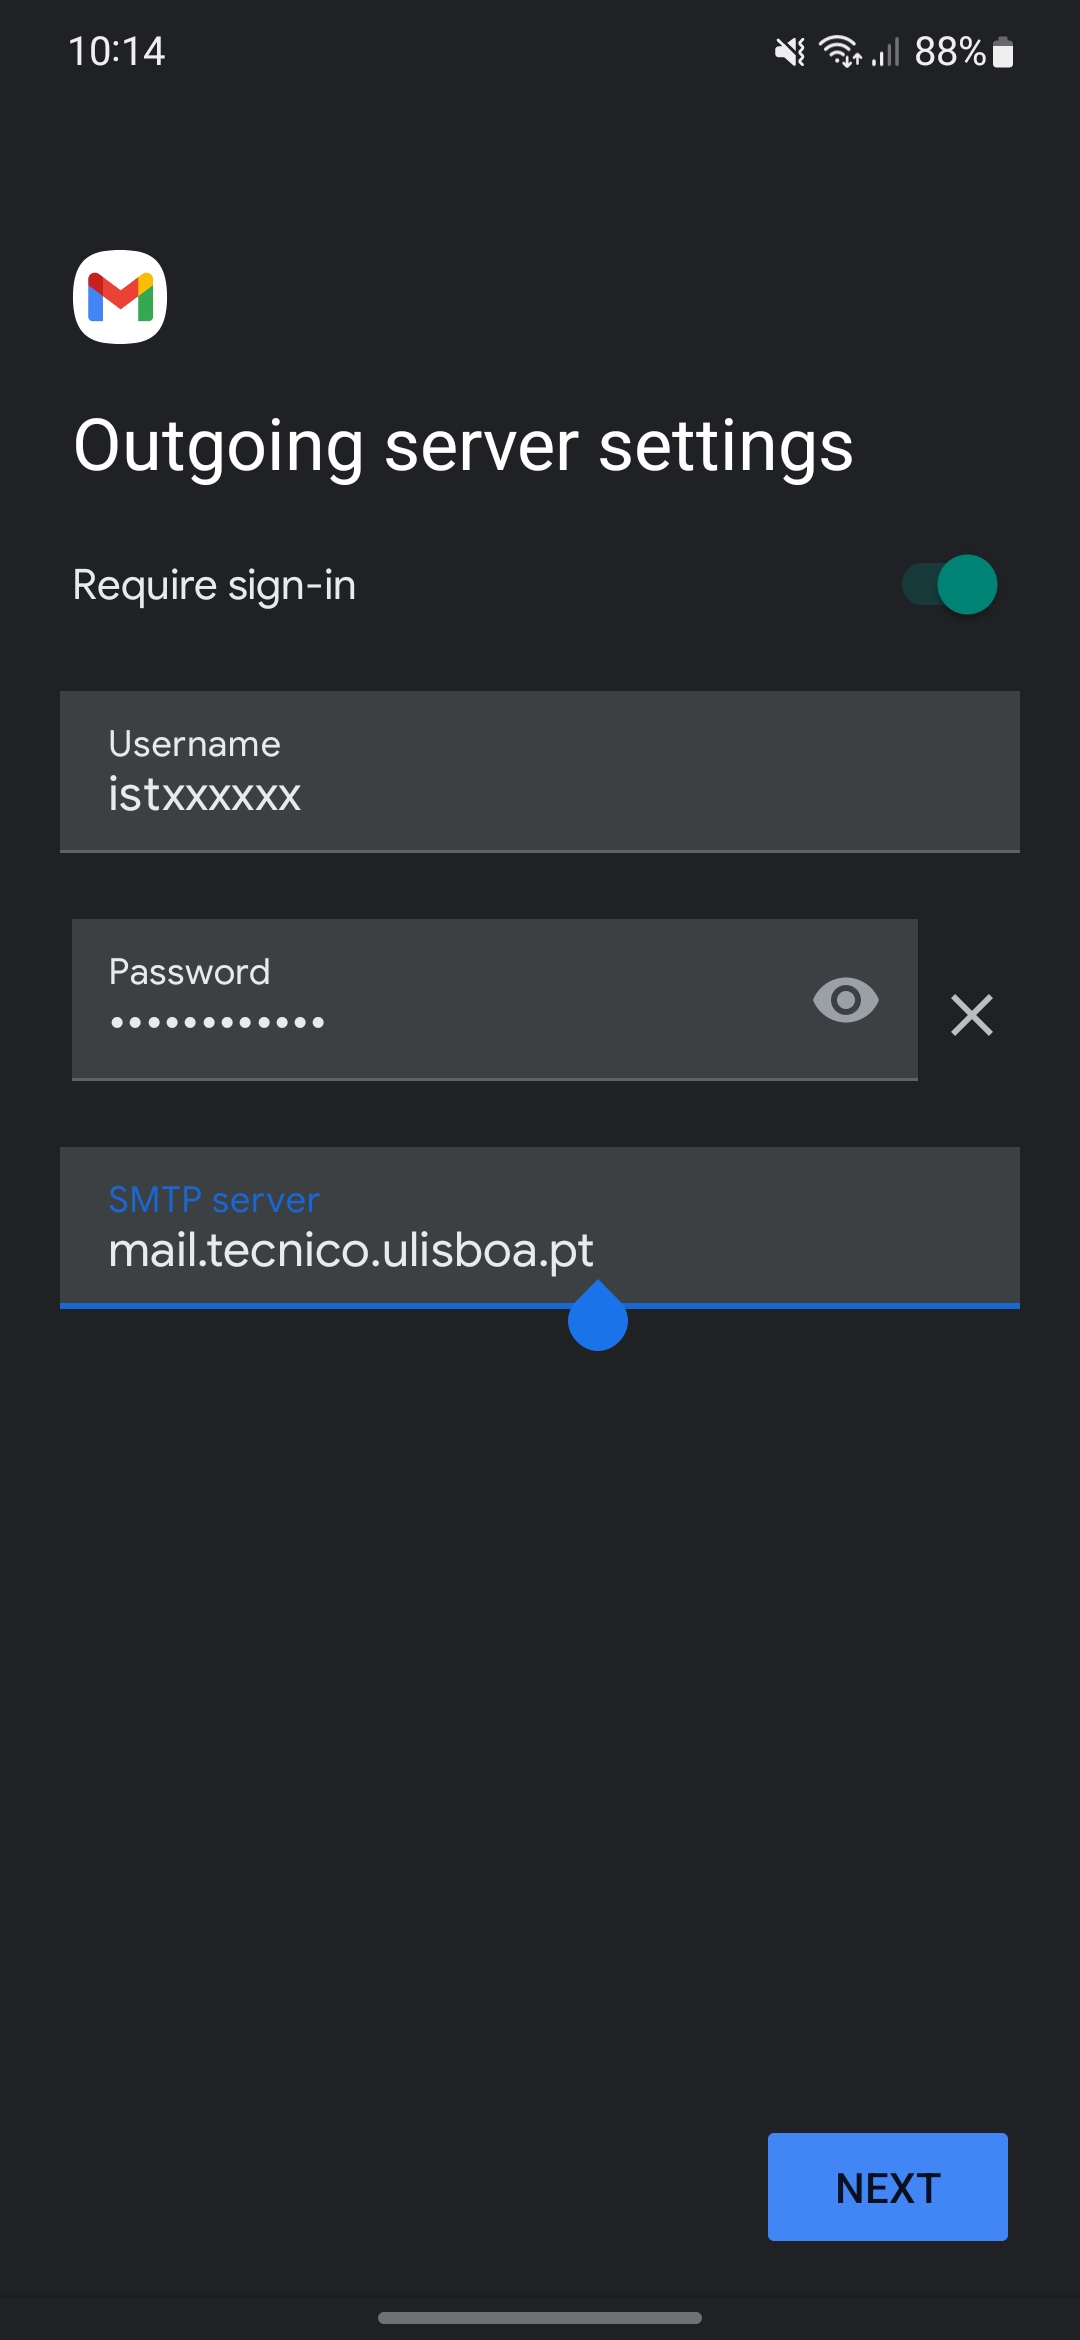
9. In the outgoing server settings, fill the following fields:
- Username – istxxxxx, where istxxxxx corresponds to your Técnico ID
- Password – password corresponding to your Técnico ID
- Servidor SMTP (SMTP Server) – mail.tecnico.ulisboa.pt
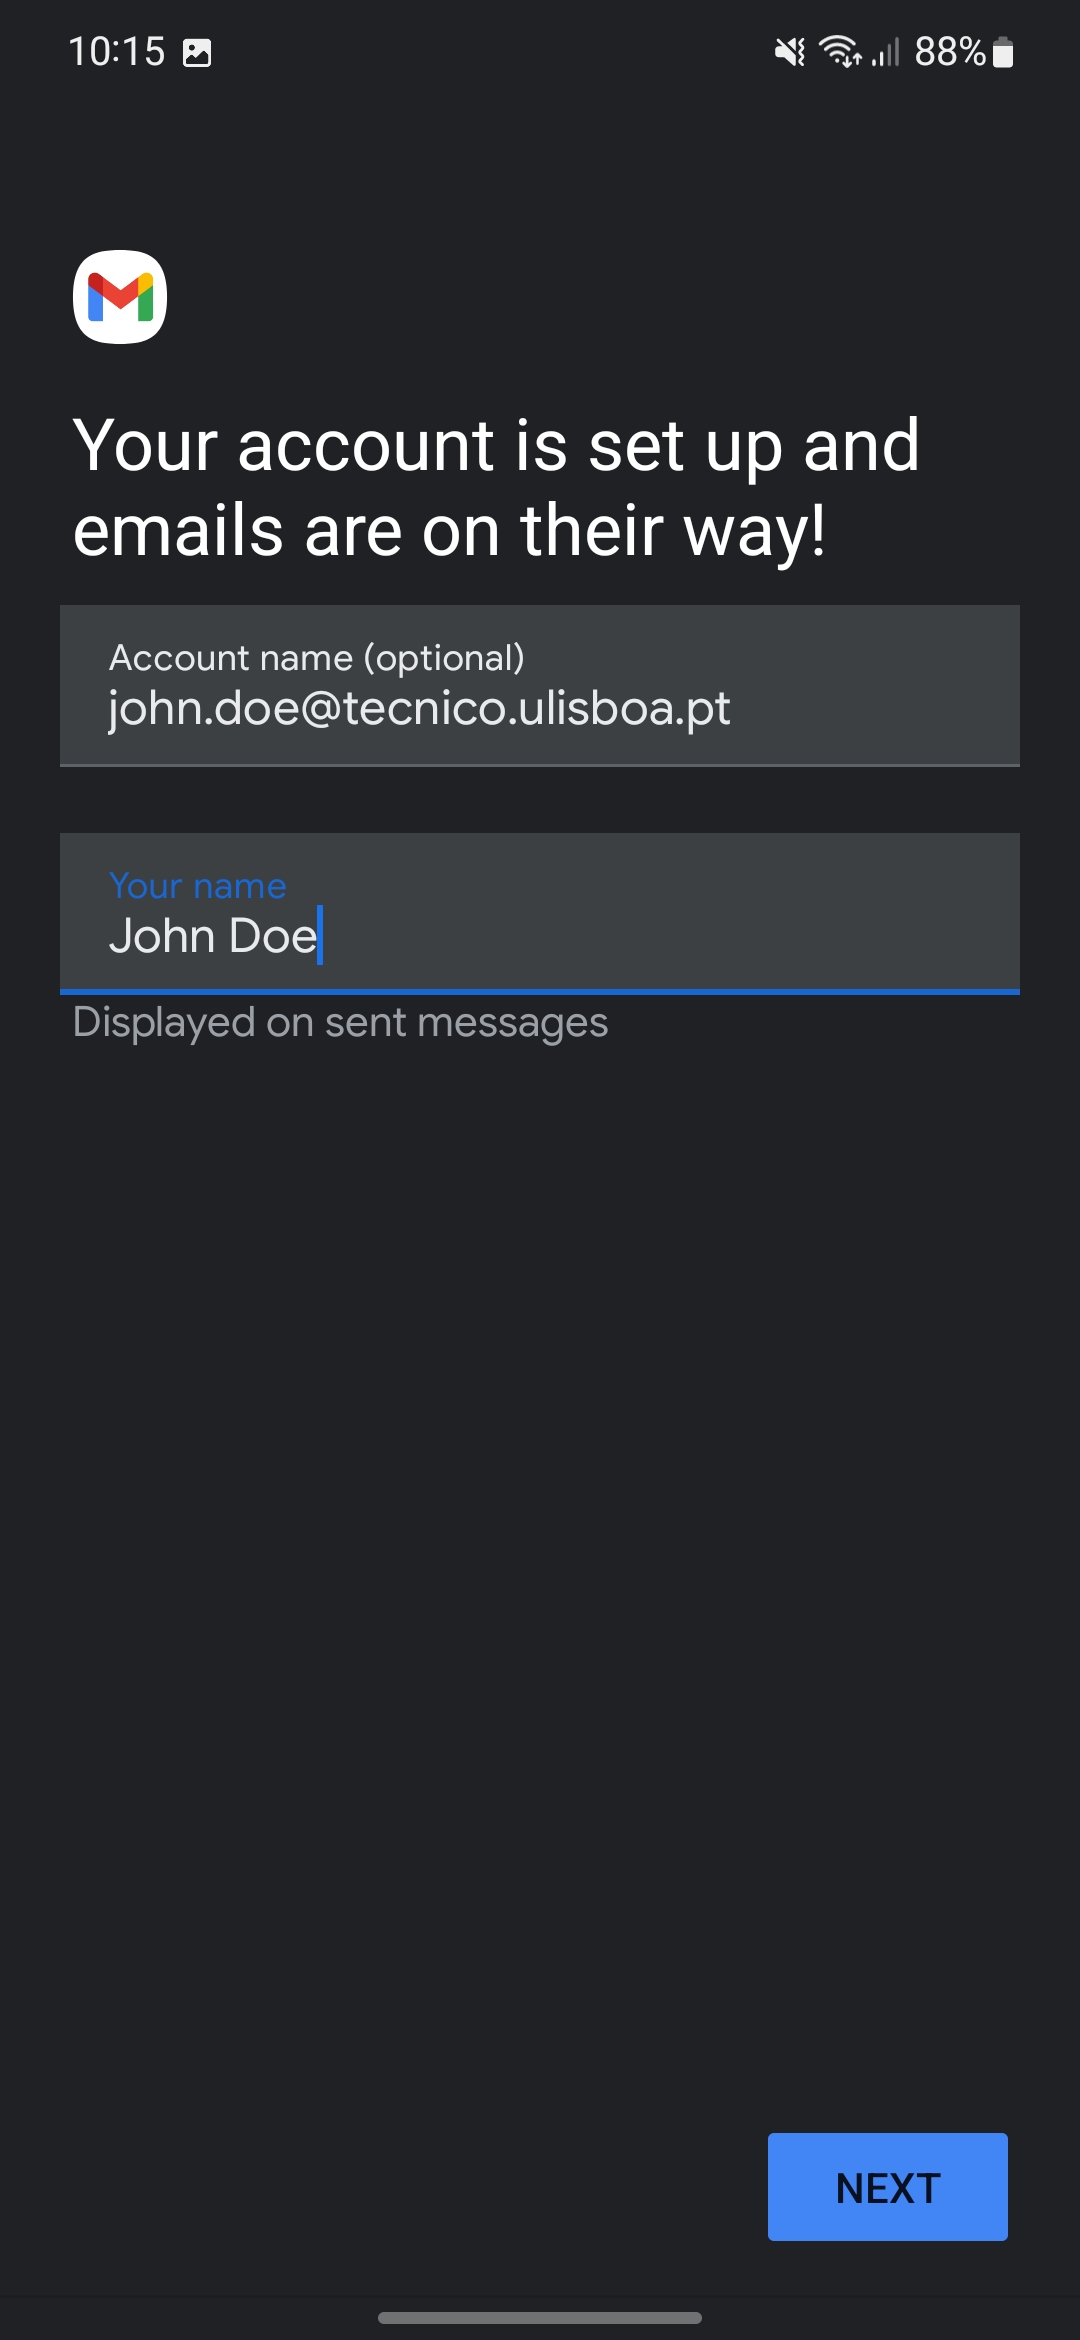
10. Next, in account options, fill the following fields:
- Account name [Optional] – insert your Técnico’s e-mail address
- Your name – insert the name to show in the sent e-mail messages
9. Your Técnico’s e-mail account in now configured. You can now open your client e-mail application (which is Gmail in this tutorial) and confirm that your account is configured.